I know I’m not the only one who starts to get the itch to travel mid-January. The weather has been extra cold and gloomy around my town, and the kids have been home from school quite a bit! It makes me want to get out of the grind of my regular routine, and head out of town. Luckily, we do have a couple of weekends away planned in the next month or so. We’ll have a few dance competitions for my girls (not exactly relaxing, but out of town), and we have a ski weekend planned here in Michigan. I confess that I’m not a skier, but I’m more than capable of bundling up and being the supportive parent at the bottom of the run who is holding water bottles and snackies.
In preparation for my upcoming out of town adventures, I’ve been pulling together a fresh travel beauty kit. I’ve been concentrating on gentle and super hydrating skin care, amazing sun protection (a lot of UV rays get reflected off of the snow, even in cloudy weather) and easy makeup. It helps a lot that some of my favorite brands have come out with new products or new travel sizes of favorite products, it’s been easy to pull together my new kit!
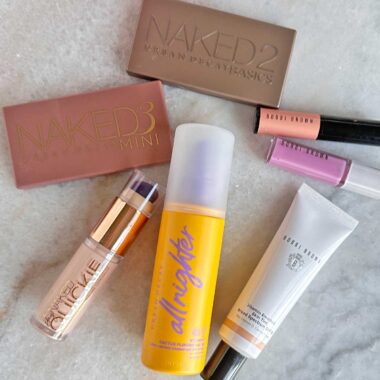
One of my favorite ways to add small sizes of great products to my travel beauty kit is via Sephora’s Rewards Bazaar. I am Rouge in the Sephora Beauty Insider Program, and you can bet I try to spend my earned points wisely! Recently they’ve had create mini-kits with hair products from Living Proof, Laneige skincare and more. Make sure you’re checking there before you check out with each order, I’ve found some great new products via the Rewards Bazaar!
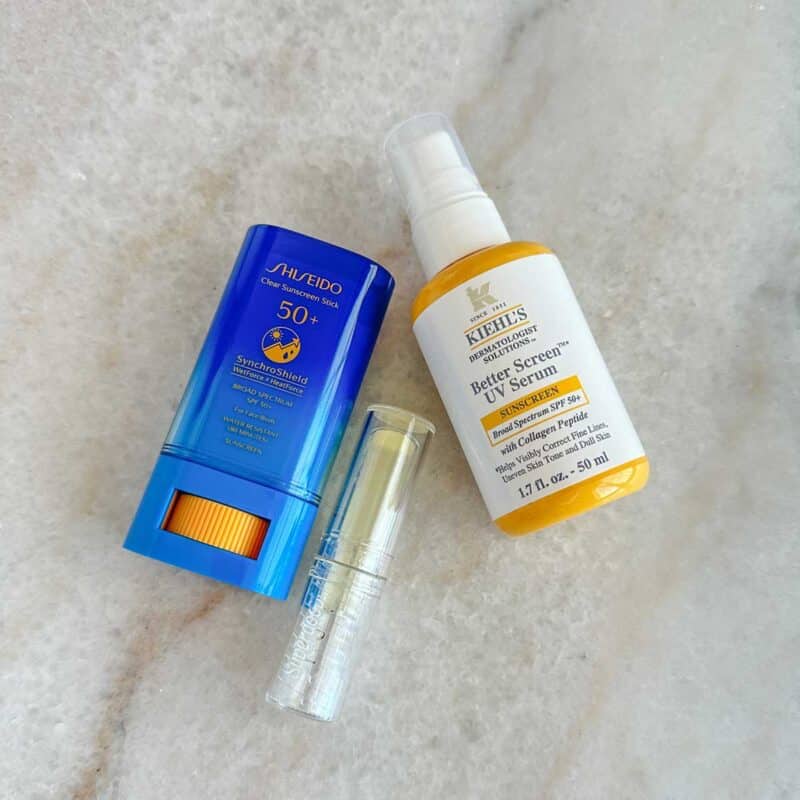
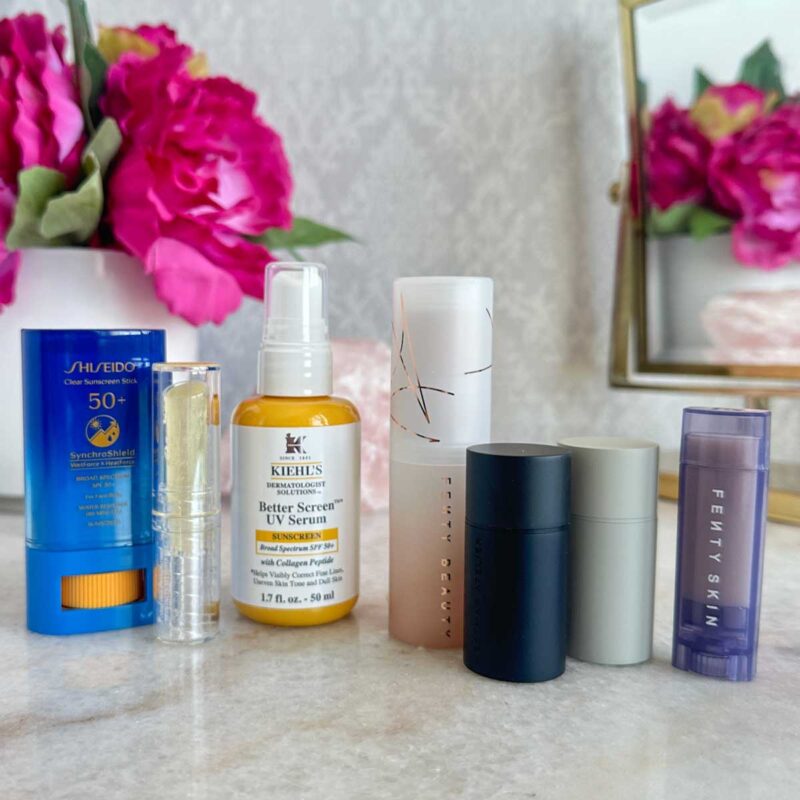
Ski Weekend Sun Protection
I mentioned that I’ve been planning my sun protection for our upcoming ski weekend, which also means that anything I’m planning for my own use is likely also going to be used by the rest of my family. I wanted something that would be lightweight enough to wear under makeup, I knew I’d need something for easy reapplication, and finally I knew I couldn’t forget about lip protection!
• Kiehl’s Better Screen™ UV Serum SPF 50+ Facial Sunscreen: My family loves this sunscreen from Kiehl’s for our bodies, but my girls complain that they think it’s a tad too thick for their faces. (Disclosure: I wear this sunscreen under makeup all the time. I think they’re being picky kiddos.) Somehow Kiehl’s knew about this, and they released Better Screen. This is even lighter-weight, high SPF, and it doesn’t feel thick or sticky on skin at all. The whole family will be using this during our ski weekend, but you can be sure it will be my new facial sunscreen of choice for under makeup.
• Shiseido Clear Sunscreen Stick SPF 50: I’ve tried a lot of stick sunscreens over the years and this one is our favorite. It doesn’t feel too thick and gloppy on the face, applies smoothly, and I know it will be easy to re-apply to noses and cheekbones on the slopes!
• Supergoop! Unseen Lipscreen Sheer SPF 30 Lip Balm: Am I the only one that’s had a hard time finding SPF lip balm? I think quite a few have been discontinued over the years. I’ve heard good things about this one from Supergoop, it will be coming with us to ski and then later to Florida for spring break.
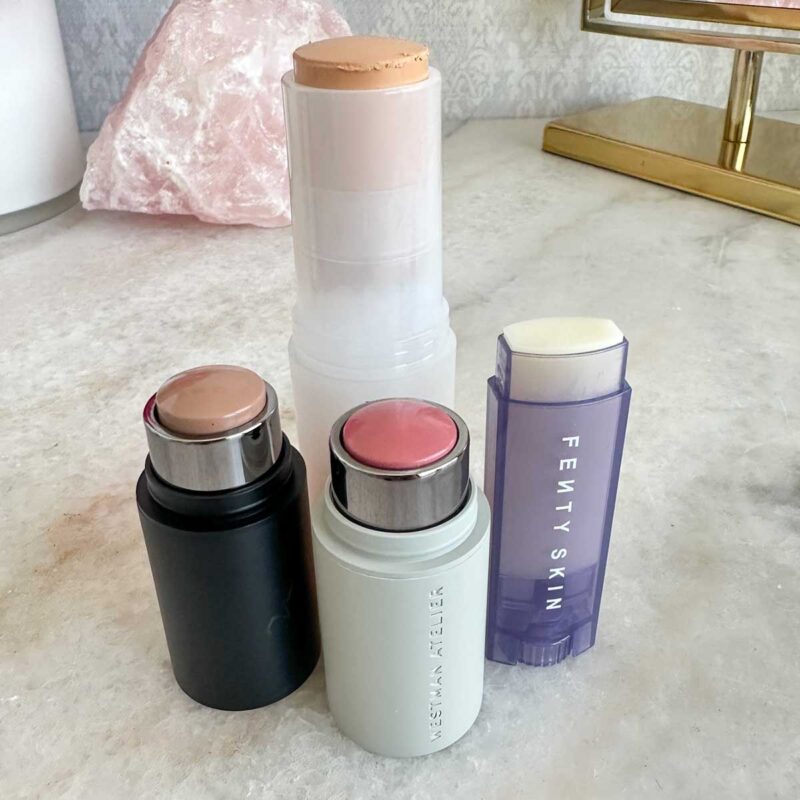
As I’ve gotten older I’ve been more and more about cream makeup. It blends better on my skin, is fast and still looks great at the end of the day. A few of my favorites were a no-go for travel though. Their packaging was huge and incredibly heavy! Luckily Westman Atelier got the message, and they have now released smaller (and much lighter) travel sized versions of their popular products!
I don’t apply these products all in 1 layer. I have found that I do a little better with a foundation stick that spreads a little further, but if I apply it at the same time as blush/contour then everything ends up looking a bit muddy. So, I do a few different layers. I blend well with brushes between each step. Here I’ve prepped my skin with the Kiehl’s Better Screen™ UV Serum and Fenty Lux Balm.
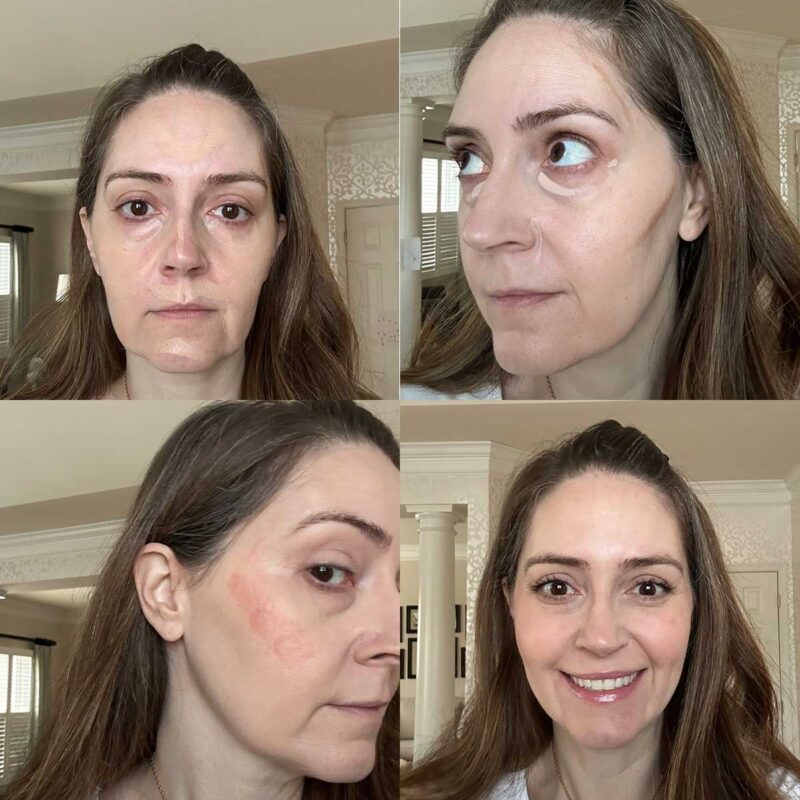
- Up in the upper left, you see my first step: Color Corrector under my eyes and foundation stick spread around areas that need a bit of coverage.
• Charlotte Tilbury Magic Vanish Color Corrector: This is my go-to color corrector. I’m wearing light here, just patted onto darkness with a fingertip.
• Fenty Eaze Drop Stick Blur + Smooth Tint Stick Foundation: My new favorite stick foundation, I wear shade 4. It blends more easily (and a tad further) than other foundation sticks, it’s just a tad more sheer I think. Once blended with a brush it looks like skin, and it lasts all day. I’ve already repurchased this a few times, including this purchase just for my travel kit. - Upper right, you can see my next step is a little added coverage under my eyes and around the nose with concealer. I also have added a tiny bit of contour on my cheekbone and temple.
I want to quickly mention the placement of contour on my cheekbone. Of course for a long time everyone said to put it under the cheekbone, and if you’ve been on TikTok or Instagram lately you may have noticed the huge number of reels saying to put it actually ON your cheekbone if you’re over 40, as it is more uplifting. I’m here to say you shouldn’t go crazy high with it. You’re creating a shadow with that contour. It looks great in the videos and the “do” side always looks higher and better than the “don’t” side. But… in person it looks odd. Your cheekbone is there, obviously poking out, and then you’ve put brown contour on it to look like shadow? It doesn’t look right. I’ve moved my contour up a little bit as I’ve aged, but I am still putting it slightly on the underside of my cheekbone. So the shadow will be where a shadow is meant to be.
• NARS Radiant Creamy Concealer in Vanilla: I like this concealer more than other, drier and thicker concealers. It’s easy to blend and has a huge array of shades.
• Westman Atelier Mini Petite Face Trace Cream Contour Stick in Biscuit: My go to contour! I swipe from the hairline toward the center of my face, this gives a higher concentration of product on the outer edge of my face. - Lower left, now it’s time for blush. I go a little above the contour, and I do angle up a little more. Don’t put a lot immediately at the outer corner of your eye/cheek bone. It’s a great place for things to crease up and make you look older.
• Westman Atelier Mini Petite Baby Cheeks Lip + Cheek Cream Blush Stick in Petal: This is a universally flattering blush shade, I use the full sized version a lot at home. - Completed look! The layers only take a minute or two and look glowy and natural in person.
What are your latest travel beauty finds? I would love to know!

Sponsored Post: This post is a collaboration with Sephora, but the product picks and opinions are all my own.
 I’m a doctor, a mommy and a bit of a beauty addict. If you let me, I can take 2 hours to get ready in the morning. Really. I'm on a quest for faster beauty that works!