

I alluded to this splure over in my recent post on The Best Luxe Beauty Products, but I recently spent a couple of hours hanging out with a few good friends at the Neiman Marcus Giorgio Armani counter at Somerset.
In those few hours we got our makeup done, something I definitely had not been planning on. I’ve been hearing about the Giorgio Armani Luminous Silk Foundation for years, especially from my friend Nancy at Beauty 411. Nancy is my go-to resource for all things super luxe in the makeup world. If it is out there, she’s tried it! And I trust her opinion. She’ll flat out tell me if something isn’t worth the money. And for her to say for years that this is her favorite foundation and that everyone must try it? Well, let’s just say that I wasn’t exactly hard to convince to sit down in the makeup chair!
When it was all over, I had perfect skin, that looked like I had almost no makeup on, and it looked amazing!
So, when I walked out, I had bought a lot of new products. And I’ve bought a few more since then. And yes, it is definitely worth it. Here’s a peek at how I’ve been using these products:
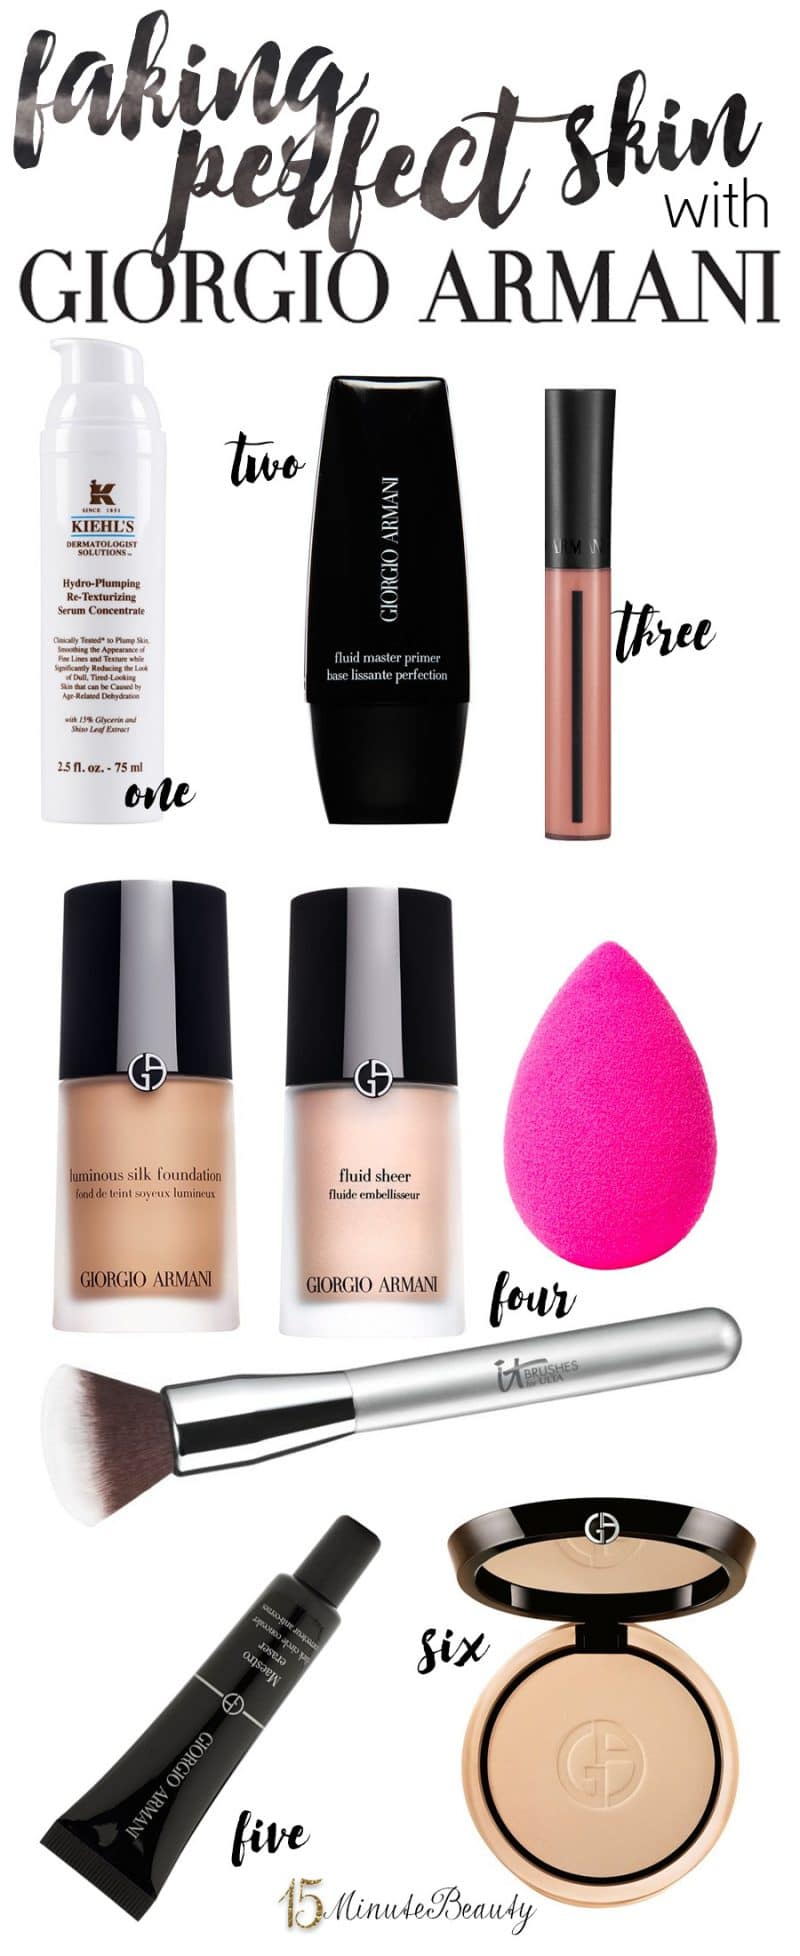
1. First I prep my face with a pretty hydrating lotion. I’ve mostly been using Kiehl’s Hydro-Plumping Re-Texturizing Serum Concentrate, it is very hydrating but doesn’t turn me into an oil slick later in the day. It also seems to sink into my skin right away. I have noticed that more so than with other moisturizers, it really helps to use a small amount (about the size of a pea) and pat it on to my skin. Rubbing the moisturizer into my skin seems to make my foundation streaky.
2. Next, I prep with a very light layer of a primer over my t-zone and areas that I have bigger pores. I have a lot of primers, but when using the Giorgio Armani I’ve been using that little tube you see in the picture at the top, it’s a small Fluid Master Primer (I got a gift with purchase set when I bought my foundation, it was in there). This primer is a clear gel that is pretty liquid and doesn’t feel sticky. You need only a tiny, tiny amount and it does help make my pores look smaller! I’ll be buying a full sized version soon I’m sure.
3. Once I’ve prepped my skin with primer, I color correct my under eye circles. If they’re dark, they are usually pretty blue, and no amount of concealer is going to fix them! I use Master Corrector to help correct them. This correct is a light liquid/lotion consistency, and the tube has a very thin brush similar to a nail polish brush. I use this to put a few lines under my eye over the darkness, then I blend lightly with a fingertip by tapping.
4. Now it’s finally time for foundation! I start by putting about 3/4 of a pump of Luminous Silk Foundation on to the back of my hand (I’m color matched perfectly with 3,75 if you’re interested). I then add just a drop of Fluid Sheer in #2, which is almost the same color with some gold shimmer. It adds just a bit of luminosity to my foundation that I love!
So, 3/4 of a pump of foundation, just a drop of fluid sheer on the back of my hand. I grab my IT Cosmetics Airbrush Blurring Foundation Brush #101, which is soft and has just the right amount of bend in the bristles. I dip it lightly into the foundation and start patting the brush around my face to apply a very light layer of foundation. Don’t buff or swipe the brush, you’ll get streaks and it seems to make pores and dry areas more visible. I stipple the foundation on to my face until it is in a light layer every where that I want it. I apply mostly to the center of my face around my nose, under my eyes, the lower part of my forehead and around on my chin. Then I grab my BeautyBlender, which is slightly damp, and I pat that on to the foundation. Now my skin looks perfect and you can’t tell that I have any foundation on!
5. If I have any trouble areas left, I grab my new holy grail, must have concealer, Maestro Eraser Dark Circle Concealer. This is a medium to full coverage foundation and it is just barely thicker than water. I kid you not. You need almost no product to get full coverage, when I get it out of the tube I actually tip the tube so it is vertical and very lightly squeeze the product on to my fingers. I then gently pat it on to any spots I’m worried about (sometimes my under eye circles, but this isn’t even every day), then use the Beauty Blender again.
6. Finally, I set it all with a little powder! I bought the Luminous Silk Compact so my powder would be a perfect match (I use #2). It’s very lightly and finely milled. I use the little included puff and gently sweep the powder on to my t-zone and under eye area only.

Check out more tips, hacks and product reviews in the Foundation Guide!
 I’m a doctor, a mommy and a bit of a beauty addict. If you let me, I can take 2 hours to get ready in the morning. Really. I'm on a quest for faster beauty that works!