My hair has been the topic of much discussion lately between a few friends and me. They all have great hair as well, but somehow my extra big hair, which I get without any teasing or backcombing, is something they covet. We’ve been talking about product options, hair drying techniques and any tips that I’ve found over the years for adding volume to my hair when I blow dry it. Here’s my easy volumized blow out tutorial.
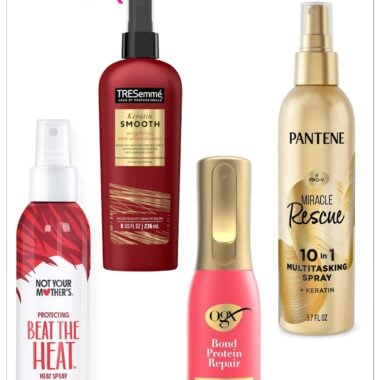
Products I Use:
Smoothing Cream
• TRESemme Beauty-Full Volume Hair Maximizer: This is a cream that smooths the hair but has volumizers to help provide bounce and lift. It definitely makes my hair easier to manage.
• Oribe Supershine Moisturizing Cream: This one smooths and adds shine, if you want a bit more hold I’d try out the Creme for Style instead.
Volumizing Mousse
• TRESemme Beauty-Full Volume Touchable Bounce Mousse: A light hold mousse that is touchable and doesn’t feel sticky at all. I love that it helps my hair look so much fuller.
• Oribe Grandiose Hair Plumping Mousse: I use less Oribe mousse than other brands, this one goes a long way.
Flexible Hold Hair Spray
• TRESemme Beauty-Full Volume Flexible Finish Hair Spray: A great flexible hold hairspray! It is really hard to find the right amount of flexible hold that is also touchable. Here’s an affordable option that I’ll be recommending over and over.
• Kerastase Laque Dentelle: This has been my go-to flexible hold hair spray for years, I think I’m on my 5th or 6 can now….
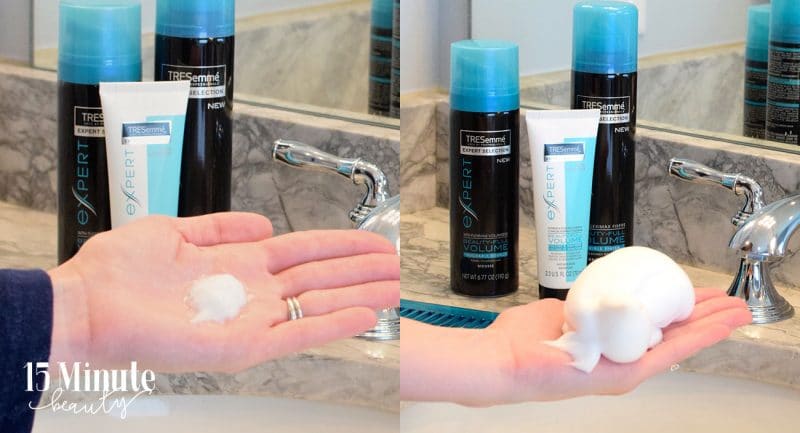
I start with using the conditioner and shampoo duo. Once I’m out of the shower with damp hair, I apply 2 of the styling products. You can see that I use about the size of a silver dollar for the Hair Maximizer first, spreading it through my hair from roots to tip. The Mousse gets a very full handful as well. I spread this through all of my hair, but I concentrate at the roots of my hair.
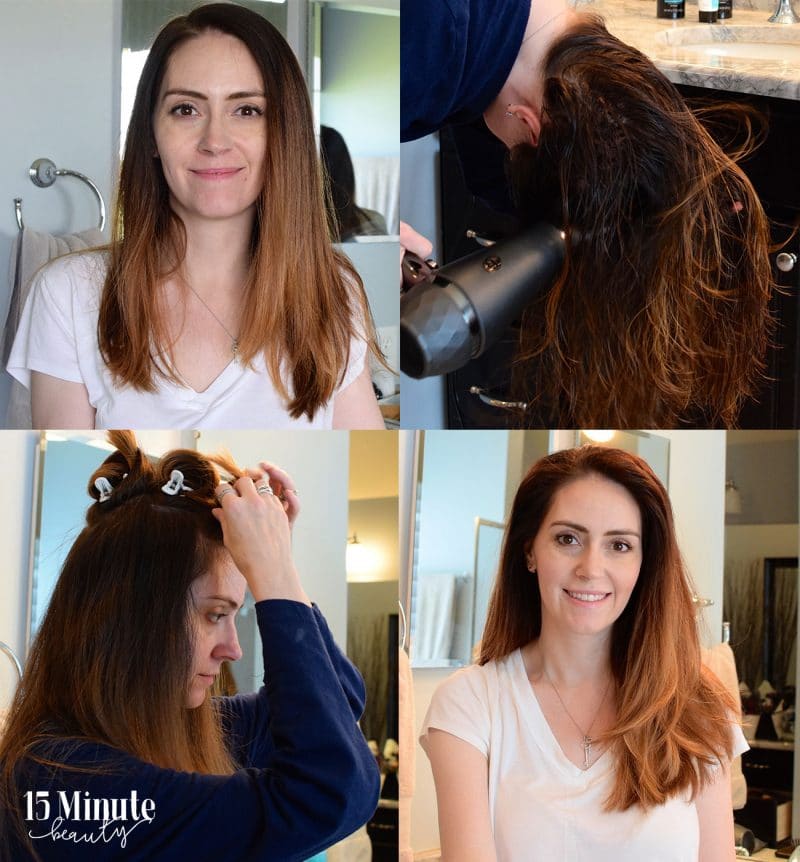
Now it is time to dry my hair. First, you can see what my hair looked like before I started. This was day 3 hair, but it had undergone the same blow drying treatment. It’s just deflated this morning, much less volume than I’ll have once it is all said and done.
Once I have the product in my hair, I start by flipping my head over and blow drying this way. If you can’t take keeping your head upside down until the hair is dry, make sure you start at the roots of your hair. Getting the roots dried with your head upside down will give you the biggest payoff in terms of time and effort. You can then flip your head over and dry the rest of your hair using a brush, pulling the hair up and away from your face.
Once my hair is dry, the real work begins! I take large sections of hair from the top of my head, and hold them straight up. I lightly spray the hair spray at the roots of these sections (both front and back) and then I roll them up into very large sections and secure with a hair sectioning clip. The sections are very large, and I roll them up into about 3-4″ in diameter rolls. You could also use velcro rollers if you want, I just haven’t found any large enough for my hair. Once I have all of the top of my hair pinned up, I go about my business for a bit. Usually I go and do my makeup and put on clothes, this is about 15 minutes or so.
When I come back and take down the pinned rolls, you can see that my hair is big and bouncy, but it is still straight. This is great foundation for curling my hair if I want, or I can leave it straight. When I leave it straight, I do a light misting of hair spray once more to help hold the style into place.
More hair and makeup tutorials from the Red Carpet and Runway!
 I’m a doctor, a mommy and a bit of a beauty addict. If you let me, I can take 2 hours to get ready in the morning. Really. I'm on a quest for faster beauty that works!